2012/06/30

Framed...what a difference!

A Little Rusty - Framed! The wonky wood was perfect!

My husband has been after me for a long time to frame my work 'properly'. I have always listened, but was loathe to part with the $$. Now I am so glad I did! What a difference a nice wood frame makes in the professional appearance of art!

Peace Like a River - framed. Framed dryer lint, imagine that!

Sunny Days in its glossy brown showcase.
Next Generation - Swan Series. Mat and frame.

Simplicity - Swan Series
Initially the Swan Series was glued to roughly painted stretched canvas and left 'as is'. I can hardly believe the difference the mat and frame makes! Thank goodness my mom saw past the canvas and bought the swan of the series, promptly removing it from there and placing it under glass for display in her home. Good call, Mom!

I will be framing out another half dozen next week. See you then!

2012/06/25

Niddy Noddy

Have I mentioned before that I am one completely spoiled woman? Yes, it is so very true, and don't I love it! Today's mail delivered several packages for my husband. He has been getting lots of boxes with the pieces and parts to complete and restore the spinning wheels sitting all around our front room... Rick unwrapped one and handed me a lovely, dark wood niddy noddy. My very first! No, I can't spin any yarn yet, but when I do...


'Serendipity' Line of Ice-dyed

 I already shared ice-dyeing with you, but only showed you the Egyptian cotton floss results. This last weekend's quilt show proved a great interest in the ice-dyed PFD quilting cotton I offered. Every piece had to be auditioned, and a lot of Rorschach jokes were cracked. :?}


We found iris and petunias, angels and dragons, lakes and mountains and lots of deep space nebulae!


Two samples of Serendipity
Flower appliques?

Poppies or petunias?

Do you see the face and figure on the far left of this piece?


What about the angel just to the right of the figure?
 This fabric is too fun! If you haven't tried ice-dyeing yet, get to it! Don't dye? Just send me an email and we can discuss your choice of Serendipity this week!

2012/06/24

Ephrata Quilt Show


The Vendor in her little mobile kingdom, Ephrata, WA
   I was a vendor last weekend at the Ephrata Quilt Show. I was amazed at the variety, the modern, the traditional, the soft and quiet, the wild and bold, spectrum of quilts on display! One thing above all else really stood out. As lovely as the quilts were what became immediately apparent is the incredible quilting done by this community of creators! Two whole cloth quilts, both entirely done by hand. Many, many, many quilts long arm quilted with such verve and intricacy! I put together a slide show of a few of my favorites, but not every quilt is represented-there were over 260 of them!
Enjoy!

 https://plus.google.com/112565146902100881628/posts


2012/06/19

Website for my art...

My husband/business manager/supporter extraordinaire is slaving away on a website to feature my art. He is putting together a slide show, portfolio categories, even a Zen shopping cart!
One of my assignments was to abandon my beloved Art From The Heart logo quilt
and have a new logo professionally designed. Where to begin?!!! So, Rick sketched out his idea, I took it from there to my PrintShop program and snipped, clipped and colored out a rough draft. Then I took it to my artist friend, Ardell Burgess. She gave me some work to look over and play with while she finalizes the logo art. On one of the scans I inverted the colors and look what I got!

So, tomorrow I pick up the 'real' new logo and sometime in the next couple weeks Rick will finalize my art website and... well, I feel pretty special!

Getting a life...

It's not as if I haven't always had a life, but it seems to be picking up speed. I love it! I just spent two days in a local park with 48 other vendors of beautiful things. It was a maiden run with my hand dyed wool in braids, batts, bird's nests (roving) and 'painter's palettes', which I came up with for needle felting persons like myself to get a variety of color without having to buy a pound of wool.


I love watching YouTube videos with all the generously free tutorials. I will watch several on some topic, like needle felting little sheep figures, and then give it a try. My first 'sheep' I thought (mistakenly) would look cute made from my line of ice cream flavors batts. What I produced was an exceedingly homely orange sherbet/vanilla ice cream doggy sheep. Then I tried a pure vanilla sheep, very tiny, and it was a bit less doggy, but still exceedingly homely.

So, I decided to try a flat version, like a needle felted applique'. A little more sheepish, but still, well, you know...


Then I shifted back to needle felting a flower, added a stem this time, and it was pretty cute.
 
I showed my 'treasures' to my husband, who is my trusted critic, for his opinion. "You know," he said, "these are just ugly enough to be cute".  Well, if nothing else, I would display them at my sales as practice pieces. By mid-morning Saturday a lady came that bought every single one, save the tiny doggy/sheep, and asked if I could perhaps make something less ice cream and more sheep, like white and brown or something. I did, and to my surprise, it looked like a sheep. I know, because every little kid that walked by my booth while I was needling the poor beast, was asked, "Do you know what this is?", and they all answered a sheep or a lamb. I can build sheep! Who'da thunk!
And the sweetest sale I made that day was to a cute little 4H member who paid with her own money for the little white and brown version because it looked 'just like my sheep'. Then her mom made my day by telling me that her daughter was going to use my little art on the educational poster the kids make for the fair telling about their animal. Is that not just the neatest thing?
Wooly brown bulldog?

I think I need to go make another...
Here's hoping practice makes perfect, or something more like a sheep!

2012/06/07

Ice Parfait Dyeing

The latest issue of Quilting Arts Magazine had dyeing instructions for 'Ice Parfait' dyeing, but it boils down to A. Presoak your fabric in soda ash solution.
B. Use any large container (mine is a clear plastic garbage can) to layer your dyeing 'parfait'.
C. place a fat quarter/half yard/yard of fabric(whatever fits and however much you want to dye) loosely scrunched in the bottom of your container.
D. Toss a layer of ice cubes over the fabric layer.
E. Sprinkle teensy selections of different colors of Procion Fiber Reactive dye powder over the ice.
F. Repeat, repeat, repeat, fabric/ice/dye until you get to the top of container or out of fabric!
G. Cover container and wait 24 hours minimum.
H. Drain container, rinse fabrics, toss them in the washer with a little Synthrapol or other gentle laundry soap, like Drift, etc. (no bleach, no whiteners, etc.)
I. Tumble dry and iron.
J. Admire your handiwork!
 I am totally sold on this style and the results you get! And since I was doing all that stacking and icing and mottling of cotton PFD yardage, the little light bulb went on in my head and I decided to toss in handfuls of white, bright Egyptian cotton floss. The fabric, and the floss to embellish that fabric, will be color coordinated! Great idea! Great colors! Not so great that even though I tied each skein in two places...well, I must have agitated too often and too violently when rinsing. And, okay, I admit, the skeins were taking FOREVER to dry thoroughly so I tossed them into the dryer without a bag to cradle their frantically flailing little bodies. I now have lots of time to repent, as I untangle and wrap each and every one, one by frustrating one. Sigh...sometimes my impetuosity drives me nuts! (But aren't they pretty!)
Oh, what a tangled web I weave, when I practice...
26 down and ??? to go?
Three and a half days later...
Is that a moose?

 Some are 'moody' pieces...
Some are celebratory!

2012/06/04

Natural Progression...


Ebay Treasures Arrived Today!


With all that wool I am dyeing, and then getting a drum carder, you know it was only a matter of time 'til the spinning wheels came to live with us! There is not a nail or screw any where in these hand crafted dears. See the wooden pegs below, left? And those 'stripes' on the legs are not paint-that is inlaid wood! And the hand-turned threads that screw one piece onto another...
CNORTHRUP gave us a clue. Online I found Charles Northrup did many things well, and one of them was making spinning wheels, mid-1800's perhaps!
OLDER than the Northrup we think, but we don't know yet how old...Rick thinks perhaps Colonial!
Pieces and parts of two very old and abused spinning wheels. We love them!


My very own 'Mad Spinster'!

2012/06/01

Eureka!

     This morning started at 5 a.m. for me. Not all that unusual, but another hour or two of sleep would have been tolerated... by 6 I had checked the email, facebook, and this blog. I had finished the last lukewarm sip of my morning ritual latte'. I returned the mug to the kitchen, shook my head and made a face. There were dishes from last night, the dishwasher needed to be run, the area under the sink-don't want to even think about it! The stove top needed scrubbing 2 months ago, the floor needs a sweep and a mop, and the general clutter of the counter tops needs taming and wiping down. But out in my quilt shed I have the latest inheritance of wool batts begging to be dyed...such an impossible choice! Such cruelty! To bliss out on fiber and rainbow colors of Kool Aid* or scrub pots and pans? But wait...dyeing wool is several steps, but they are individual steps and cleaning can be done in between batches and steps! Eureka! 
     Got the big kettle with water on the stove and cranked it up to high. As soon as it almost comes to a boil, I turn it down to simmer, add the vinegar and the color, give it a swirl of a stir and sink the first braid of wool. While that is going on I fill the sink with hot soapy water and whip out those dirty dishes between sloshing wool, rinsing wool, soapy water washing wool and final rinsing wool. I add the hanging of the wool to drip dry out on the deck to the pattern just after I sink the next braid in line. Soon the deck is lined in dripping rainbows, under the sink is sparkling, the dishes done, the dishwasher sloshing happily along, the drip pans from the stove top are scrubbed and the stove top almost ready to be cleaned. I get the series of clothes loads sorted and started, just to show off! AND made bran/coconut/walnut muffins for sustenance...
     I would like to say that I continued on my industrious way to the shining end, and I would have, too, but...as this was all winding to an end the post(al) lady honked her jeep horn in the driveway and I went out to find she was delivering my drum carder!!! Here is a pic of the newest member of our family!
Greta
It is an oldie but a goodie just in from Saskatchewan! Needs cleaning and refinishing and some carder teeth straightened out, but OH-MY-Heart be still. I love it!
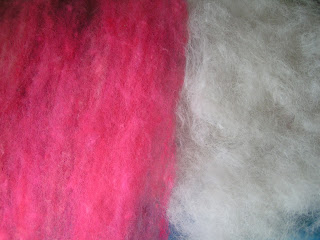
The pink wools are the first thing I played with, then moved on to my first and only bag of alpaca. Like pink clouds and angels' breath!


Now to finish cleaning the kitchen, folding the laundry and re-braiding the wool. What a wonderful day!
Muffin Recipe- NOT your grandmother's bran muffin...

1/4 cup vegetable oil
1 egg
1 cup milk
1 1/4 cups 100% Bran cereal
1/2 teaspoon salt
1/2 teaspoon baking soda
2 1/2 teaspoons baking powder
1/2 cup granulated sugar
  To avoid muffins 'peaking' like tepees, I mix all the ingredients above together first, then add
1 cup sweet shredded coconut
1 cup broken walnuts

After I mix the coconut and walnuts in, THEN I add the flour and barely mix it through.
1 cup all purpose flour

Grease muffin tin (12 count) and fill with batter.
Bake at 350* about 20 minutes, but keep your eye on them. You want them fairly firm to the touch but do not over-bake.  Just fine and dandy eaten warm with butter... :?}